Using inflatable tents in winter: expert review & best wood-stove setups
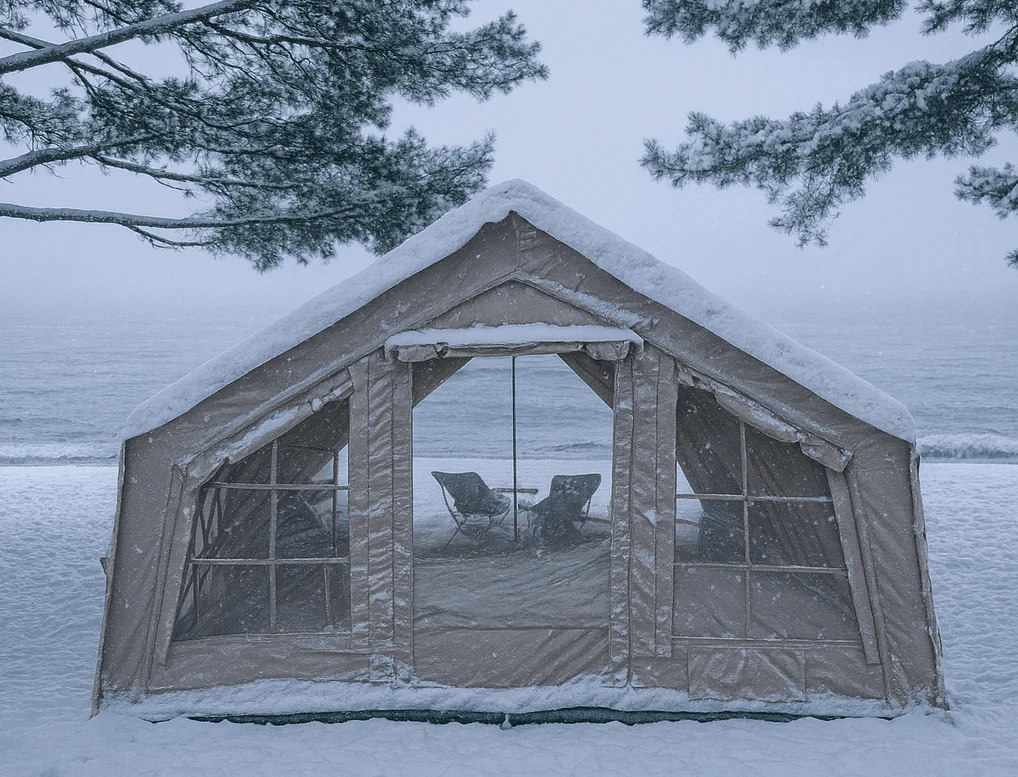
If you’re camping in winter and want a warmer, quieter night than most traditional tents can offer, an inflatable tent paired with a wood stove is the move. Air-beam frames set up fast, resist wind and snow, and keep a stable temperature inside. This guide gives practical tips for insulation, ventilation, and durability during winter camping.
Prefer quick picks? Start here:
- Read our coody inflatable tent review to compare models and specs.
- Family basecamp: winter inflatable tent with wood stove (deep-winter capacity and living space).
- Mid-size hot tent: coody inflatable tent with stove (balanced footprint for weekend trips).
- Compact duo rig: inflatable tent wood stove (efficient heat for two to four).
- One-click outfitting: inflatable tent with stove package andinflatable tents with stove included for safe clearances, liners, and must-have accessories.
Winter camping basics: temperature, insulation & ventilation for an inflatable tent
Winter camping lives or dies on temperature control. An inflatable tent holds shape in wind and snow, but comfort comes from three things working together: smart ventilation, layered insulation, and steady heat. In cold weather conditions, keep the camp routine simple and repeatable so the interior stays warm and comfortable while gear dries.
Temperature & airflow: how to prevent condensation
Cold fabric plus warm breath equals water—so airflow is crucial. Aim for a low intake vent and a high exhaust path to maintain gentle airflow and prevent condensation and moisture buildup inside the tent. Use mesh on upper ports to block sparks while moving air. Never close every vent “to save heat”—you’ll just trap vapor and lose warmth as surfaces wet out.
Condensation checklist:
- Crack a lower vent; open an opposite high port to provide insulation through moving dry air and keep the interior warm.
- Dry gloves and layers high, away from the pipe; wipe frost at lights-out.
- Keep a reflective mat under the stove to protect the floor and improve heat loss management.
Insulation layers & gear for a comfortable temperature inside
Ground chill is ruthless. Use two pads (closed-cell + inflatable) to create a layer against the cold ground, then add a canopy liner for excellent insulation. Quality door skirts and seam tape help the camping tent withstand gusts and spindrift; a bathtub floor that’s waterproof boosts durability and resistance to slush. Choose durable materials and high-quality materials—beam sleeves, fabrics, and valves that stay flexible at cold temperatures and strong winds.
Think in systems: pack gear smart, use a stove board and drying line. Choosing the right tent—capacity, living space, and feature set—remains crucial to a comfortable temperature inside and a truly enjoyable winter camping experience.
Inflatable tent vs. pole tents: winter durability, setup & pack-down
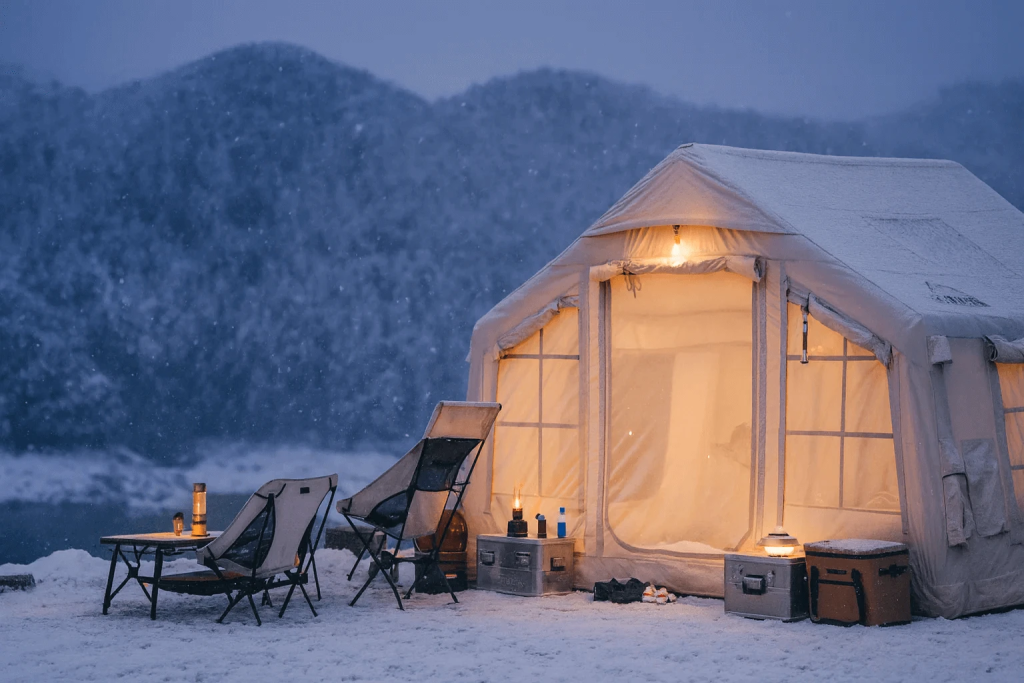
In real winter conditions, time-on-task is everything. An inflatable tent pumps up fast with gloves on, holds shape in wind and snow, and keeps a steadier temperature while you camp. Pole sets can work, but air-beam designs reduce cold-fumble steps and failure points—exactly what you want for serious winter camping.
Durability & materials that actually matter
Cold makes cheap plastics brittle. For a durable winter shelter, choose high-quality beam films and sleeves that stay flexible at low temperatures and are designed to withstand gusts and spindrift. Look for double-ripstop canopies, reinforced guy points, and a bathtub floor that’s waterproof. Beam protection around the jack is critical when running a wood chimney—heat shields and jack collars are not optional gear. These features add real durability and keep the camping tent reliable trip after trip.
Setup, interior use, and pack-down
Air frames stand with fewer motions, so you can anchor first, inflate, then fine-tune guys. Inside the tent, plan gear flow: keep the pipe lane clear, hang a drying line, and stage a fire-safe board under the stove to minimize heat loss into the ground. On exit, vent, wipe frost, cool the flue, and pack liners separately so the interior stays clean and ready for the next camp. The result is a compact bundle that travels well yet feels roomy at night.
Bottom line: for a durable winter setup that’s quick to pitch, stable in winter conditions, and friendly to gloves, an inflatable platform is the smarter choice—especially when your route or weather window is tight.
Ventilation, condensation & wood-stove safety (the non-negotiables)
A hot inflatable tent is only as good as its airflow plan. In winter, you’re constantly balancing heat, moisture, and burn quality. Set a predictable pattern on every camp so the tent stays warm, dry, and safe.
Intake – exhaust: the airflow pattern that prevents drip
- Open a vent low on the windward side and a high outlet opposite it to prevent vapor buildup inside the tent.
- Run a steady, low flame rather than surging; that keeps flue temps up, stabilizes temperature, and reduces condensation.
- Use mesh on the upper port to block sparks while maintaining airflow.
- If the fabric ices, crack the door briefly and wipe interior frost before lights-out to maintain a comfortable temperature inside.
Stove placement, clearances, and liners
- Center the pipe path so it’s never over sleeping bags or main gear lanes.
- Keep mandated clearances to canopy and liner; use a high-temp jack and heat shield to minimize heat loss to the floor and protect fabrics.
- A rigid base plate under the stove spreads load on snow and cold ground; it also makes pack-out cleaner.
- For groups, assign one person to watch draft and fuel—steady is more efficient than “blast and coast.”
Night protocol (simple, repeatable, safe)
- Dry gloves and socks high, well away from the pipe.
- Set the lower intake a finger-width open; crack the top outlet.
- Bank the wood so the camping stove runs smooth, not smoky.
- Before sleep, re-tension guys so the canopy stays taut in strong winds and low temperatures.
How to choose an inflatable camping tent for winter
You don’t just choose a tent; you choose a system. In real winter use, a good inflatable tent balances insulation, ventilation, and space so you can camp comfortably when weather conditions turn harsh. Use the checklist below to choose the right model for your route, your group, and your gear—and choose features that actually matter in snow and wind.
Capacity, living space & pack strategy
Capacity vs. living space. A “4-person” label rarely accounts for a stove lane, wood, and wet layers. Prioritize true interior width, peak height for drying lines, and floor area around the pipe.
Pack reality. In winter camping, you carry more layers, fuel, and food. Keep the pack footprint practical, but don’t undersize the shelter; a little extra living space pays off when you’re pinned by snow.
Layout matters. Door placement, vestibules, and liner compatibility affect nightly flow and maintenance (wipe-downs, frost control) so you can maintain a stable temperature and minimize moisture.
Materials & build quality (designed to withstand winter conditions)
Canopy & floor. Look for durable materials and high-quality materials with abrasion resistance, taped seams, and a bathtub floor that’s truly waterproof on icy platforms.
Beams & valves. Flexible films and sleeves that behave in low temperatures are crucial. Quality valves make cold-glove inflations predictable and reliable.
Stove jack & shields. Heat-rated jack, spark control, and a base board reduce heat loss and protect fabrics—details that keep the shelter safe and efficient through long burns.
Guy system. Multiple tie-outs and snow skirts stabilize the canopy to withstand strong winds and drift.
Ventilation, condensation & insulation (the winter triangle)
Airflow plan. A low intake vent and high exhaust keep airflow moving to prevent condensation and buildup inside the tent while the stove holds a comfortable temperature inside.
Insulation layers. A canopy liner, ground mat stack, and thoughtful layering around sleepers provide insulation and keep the interior warmer on the cold ground.
Feature priorities for harsh weather
Must-have features. Liner compatibility, robust guy points, high-temp jack, pump + repair package, and interior tie-offs.
Brand signal. Favor reputable brands that publish fabric specs and beam details; those disclosures usually track with real-world durability and high-quality execution.
Bottom line: choosing the right tent for winter camping means matching people, route, and stove to a build that’s compact enough to pack, yet solid enough to feel cozy and reliable in harsh weather conditions.
Setup & maintenance in winter conditions (10-minute routine)
A good winter pitch is simple, repeatable, and safe. This sequence keeps temperature, insulation, and ventilation in balance so your inflatable tent stays reliable through snow and wind on any camp.
Site & orientation (2 minutes)
- Probe for crust, drifts, and buried hollows; avoid cold-air basins.
- Face the door leeward; use trees or terrain as a wind break.
- Stamp a platform, then bury “deadman” anchors (bags or stakes) for primary guys—maintenance starts before the first pump stroke.
Fast pitch sequence (5 minutes)
- Layout and pin four corners.
- Inflate beams to spec (expect slight pressure drop as the air cools). Re-top after 5–10 minutes to maintain shape.
- Add perimeter guys; tension until panels are smooth to prevent flap and minimize moisture on fabric.
- Install the jack, seat the pipe, and set your airflow pattern: low intake vent, high exhaust.
- Drop a reflective board under the stove; stack ground layers (closed-cell + insulated pad) for better insulation and fewer cold spots.
- Hang a short drying line and keep the pipe lane clear of gear.
Night routine (2 minutes)
- Bank the fire for steady heat—smooth burns are more efficient than surges.
- Crack the lower intake and the opposite high port to sustain airflow and reduce condensation.
- Wipe frost before lights-out; re-check guys so the camping tent stays taut when gusts build.
Keep water and gloves handy; place a brush at the door to knock snow off before re-entry.